
Mastering Resolution: Image Sizing
An often misunderstood concept in photography is "resolution". It's the backbone of image clarity, from the moment of capture to the final print or digital display.
Resolution, often wrapped in jargon like DPI (dots per inch) and PPI (pixels per inch), significantly influences how your photographs are presented and perceived. Here's a guide on how resolution impacts your images.
At its core, resolution signifies the level of detail your image contains. It's all about pixels — those minuscule dots that come together to create your picture. The higher the pixel count, the richer the details. More pixels provides higher resolution and increased detail in your photos (there are other factors to consider such as the quality of your lens, etc, but for now let's just look at resolution).
Sensor Resolution: The Starting Point
Your camera's sensor is comprised of millions of light-sensitive cells, each one capturing a small fraction of the scene you're photographing. The total count of these cells equates to your camera's resolution. For instance, a camera that captures an image at 5152x3864 pixels boasts a 20-megapixel resolution (5152 x 3864 = 19,907,328 individual pixels, which in marketing terms is rounded up to 20 million).
DPI and PPI Explained
DPI is an abbreviation for "Dots Per Inch" and is used in the print world to indicate the number of ink dots within an inch of paper. The higher the number, the higher the print resolution. 300 DPI is fairly standard for photographic prints which produces 90,000 individual print dots within a square inch of paper (300 x 300).
When images are displayed on a digital platform such as a computer monitor or phone screen, the resolution is measured as Points Per Inch (PPI). This is a measure of pixel density on screens and for general image display on websites the resolution is set to 72 PPI.
These two terms, DPI and PPI, are sometimes mixed up which only serves to confuse the issue, but ultimately they both refer to the resolution of the output media — print or screen.
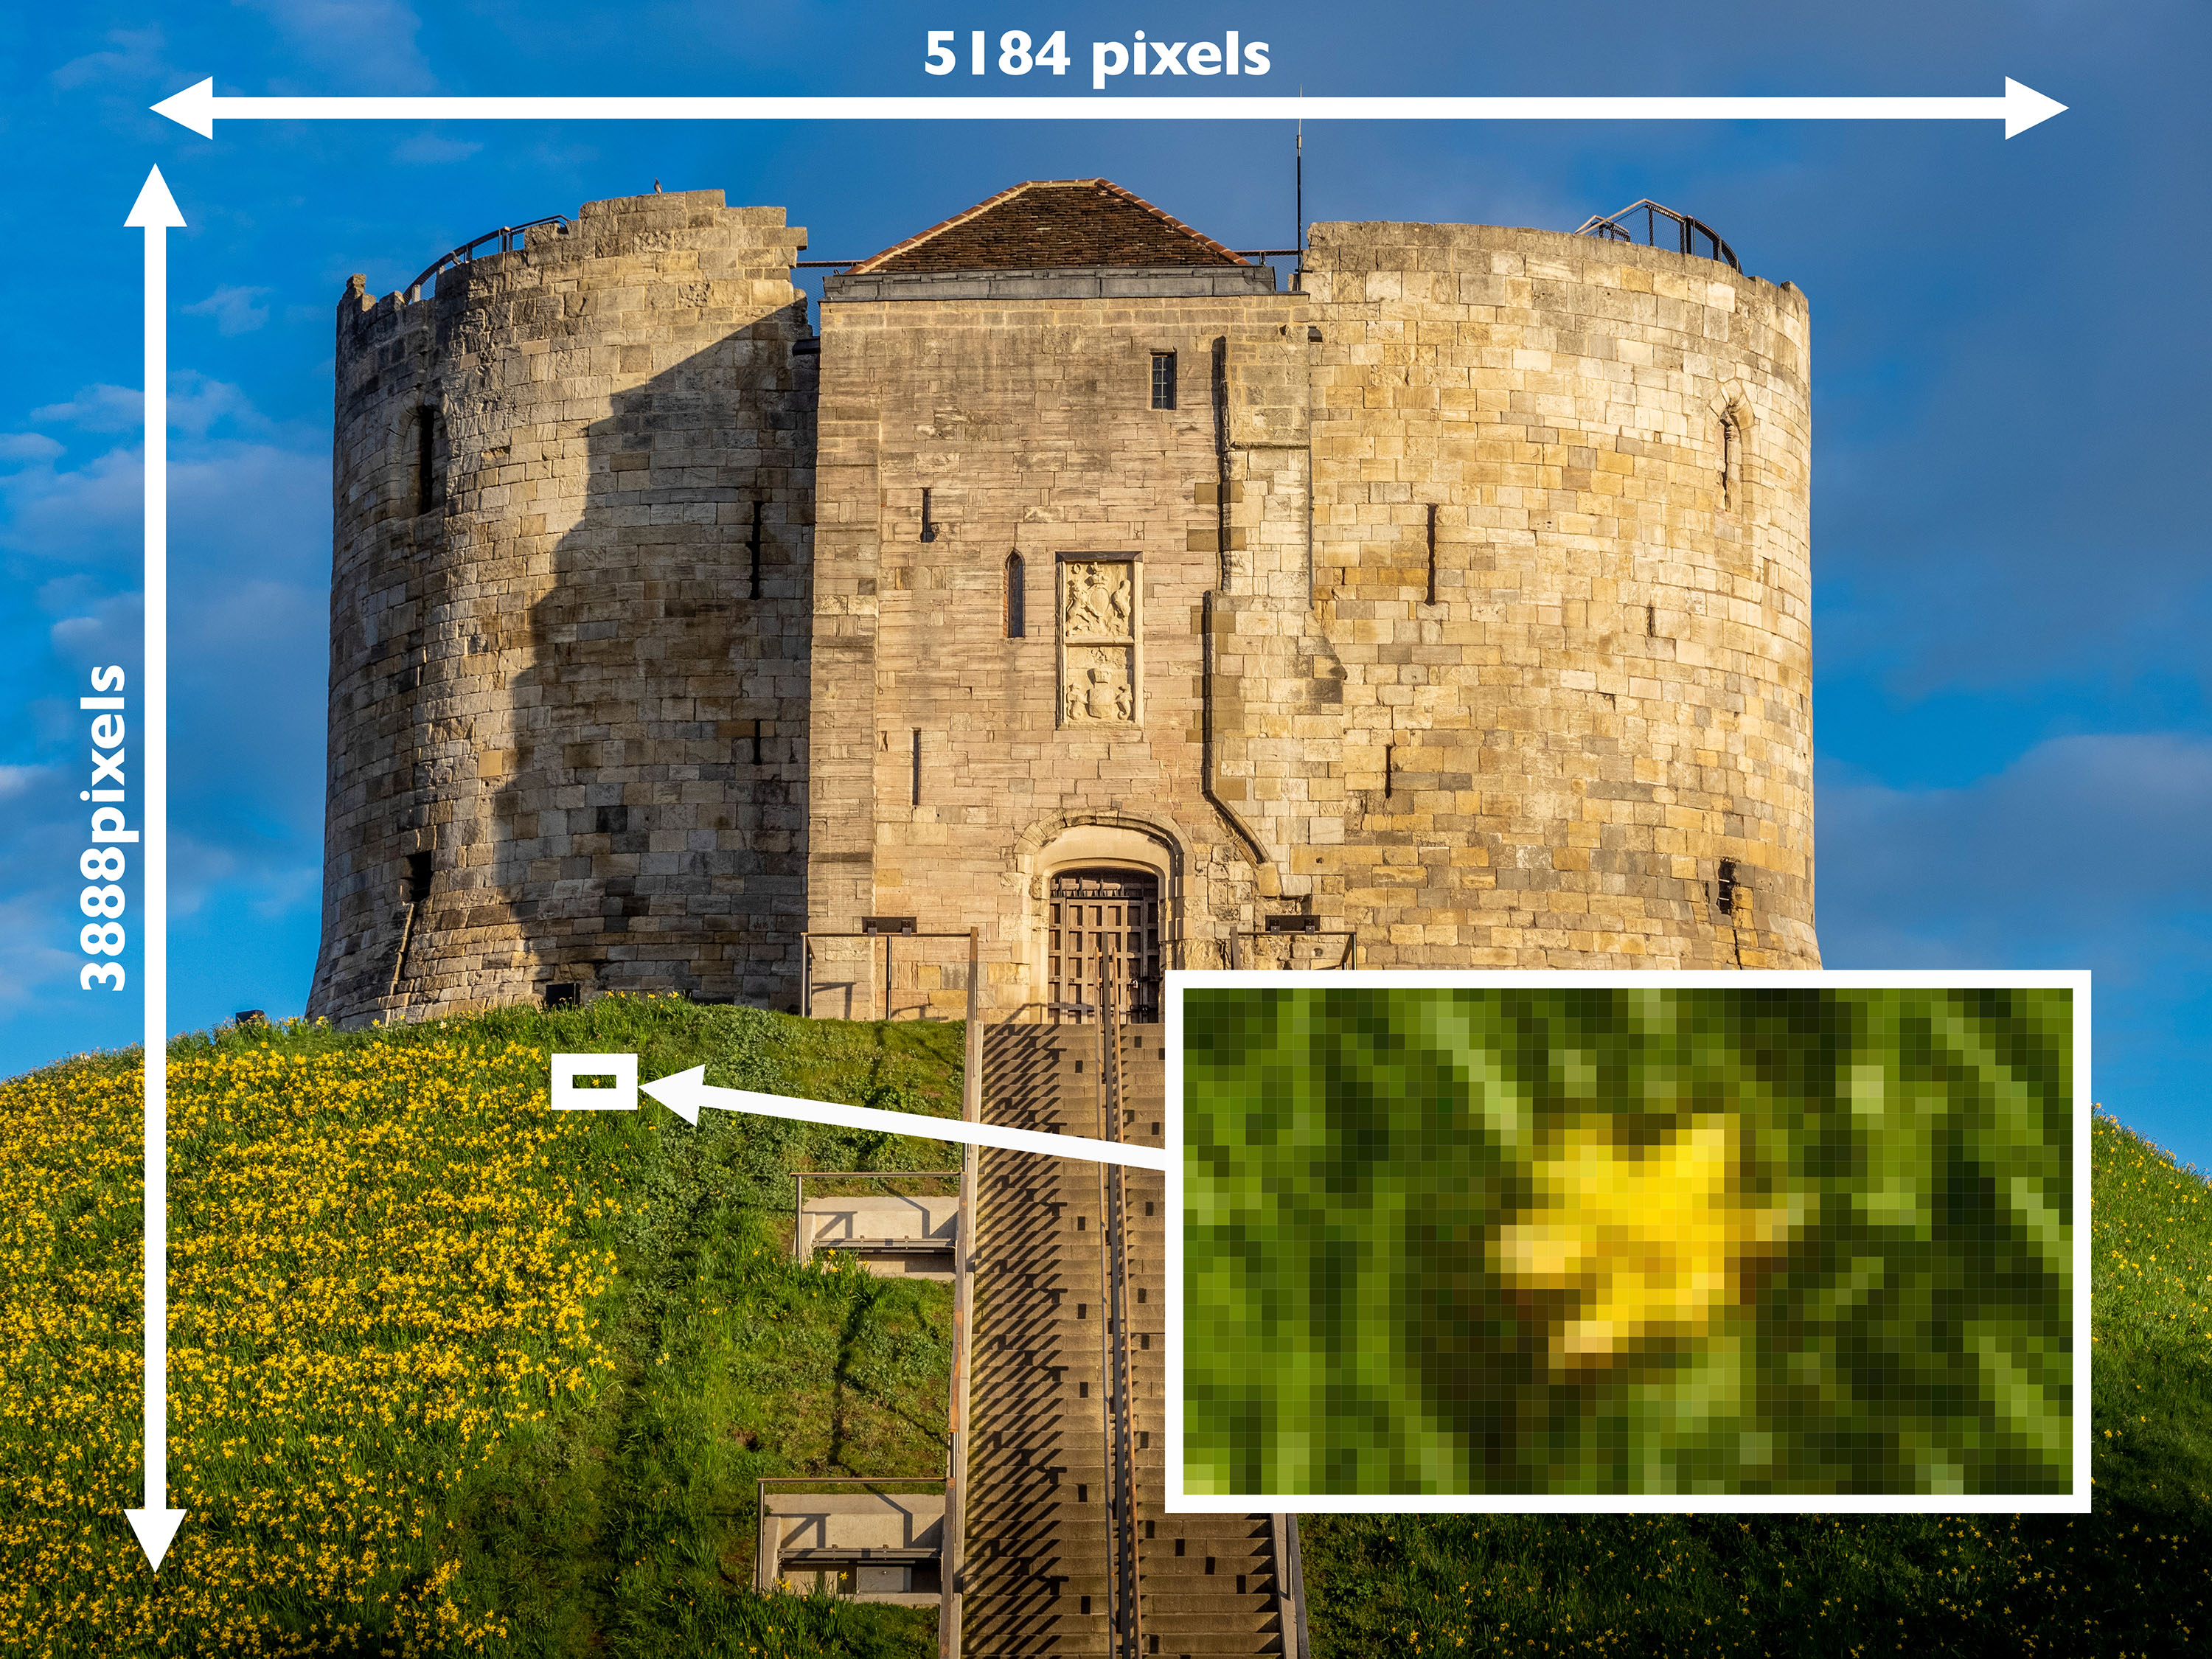
This photo has a resolution of 5184 x 3888 pixels. Each pixel is a single colour and there are 20,155,392 of them that together make up the full image. To produce high quality photo prints we need 300DPI. So this image could be printed to 17.28x12.96 inches without having to scale it up using interpolation.
Resizing Your Images
Adjusting your image size is a common necessity, whether to ensure fast web page loading or to prepare for a stunning print.
- Optimizing for Screen/Web: Keeping image file sizes small for the web usually means sticking to a PPI of 72, with pixel dimensions tailored to your platform's specifications.
- Aiming for Print: High-quality prints demand higher resolutions. For example, to achieve a crisp 10"x8" print, an image size of 3000x2400 pixels at 300 DPI is ideal. This formula ensures that each inch of your print is densely packed with detail, avoiding any loss of clarity.
Resolution and Print Sizes
Understanding how an image's resolution translates to physical print sizes without quality loss is pivotal. Consider an image of 6000x4000 pixels. At 300 DPI, optimal for high-quality prints, this equates to a maximum print size of 20"x13.3" without requiring interpolation to fill in details (6000/300 = 20 and 4000/300 = 13.3). If a smaller print is required then the image can be downsized before printing, or an even higher printing resolution can be used. If a larger print is required then the resolution of the file isn't high enough and so the image has to be increased in size. This is done using a process called interpolation.
Interpolation might sound like a complex term, but it's essentially a digital technique used to increase the size of an image by artificially creating new pixels between the existing ones. Imagine you're trying to stretch a small blanket over a larger bed; interpolation stretches your image in a similar way. The software guesses and fills in the gaps with new pixels, based on the colours and patterns of the surrounding ones. While this can make your image larger, it can lead to a loss of sharpness and detail, making the photo appear blurry or 'soft.' That's why it's generally best to avoid relying on interpolation for significant increases in image size. Software packages are available which use AI techniques to reduce the effects of interpolation, but it's always best to avoid any kind of upscaling if possible.
The resolution of a print is directly related to the viewing distance, so although a high quality photographic print which will be viewed close up required at least 300DPI, a billboard poster may be printed using a DPI as low as 30 simply because it will be viewed from a much greater distance.
Screen Resolutions
In the digital realm, screen resolution becomes your focus. Monitors and digital platforms vary greatly in display standards. For instance, a Full HD display at 1920x1080 pixels offers a different viewing experience compared to a 4K screen, which boasts a resolution of 3840x2160 pixels. In general, an image for display on the internet is resized to 72dpi and saved as a JPG file to keep the size to a minimum. This approach will cater for most situations without creating unnecessarily long download times.
How to Resize Your Images
Resizing your photographs using editing software such as Photoshop is a simple task and is usually a menu option labelled "image size".
If you're adjusting the size for print/screen without wanting to alter the image's pixel dimensions, ensure the "Resample" option is not ticked. This tells the software you're changing the image dimensions without adding or subtracting any pixels from the image itself, preserving its original maximum quality. Ticking the "resample" option will scale the original image up or down depending upon the DPI/PPI entered.
Another vital feature is the "Constrain Ratios" (or "Constrain Proportions") option, which maintains the aspect ratio of your image — its width to height ratio — preventing any distortion. By keeping this option checked, you can adjust the size of your image, and it will proportionally scale, ensuring your subjects don't end up looking unnaturally stretched or squashed.

[image:images/image-03.jpg|alt:Demonstrating resizing images.)
Incorporating a clear understanding of resolution into your photography knowledge allows you to manipulate your images with confidence, ensuring they produce the best experience for your audience, whether printed and hung as art or shared digitally across the globe.