Level Up: Mastering Horizons
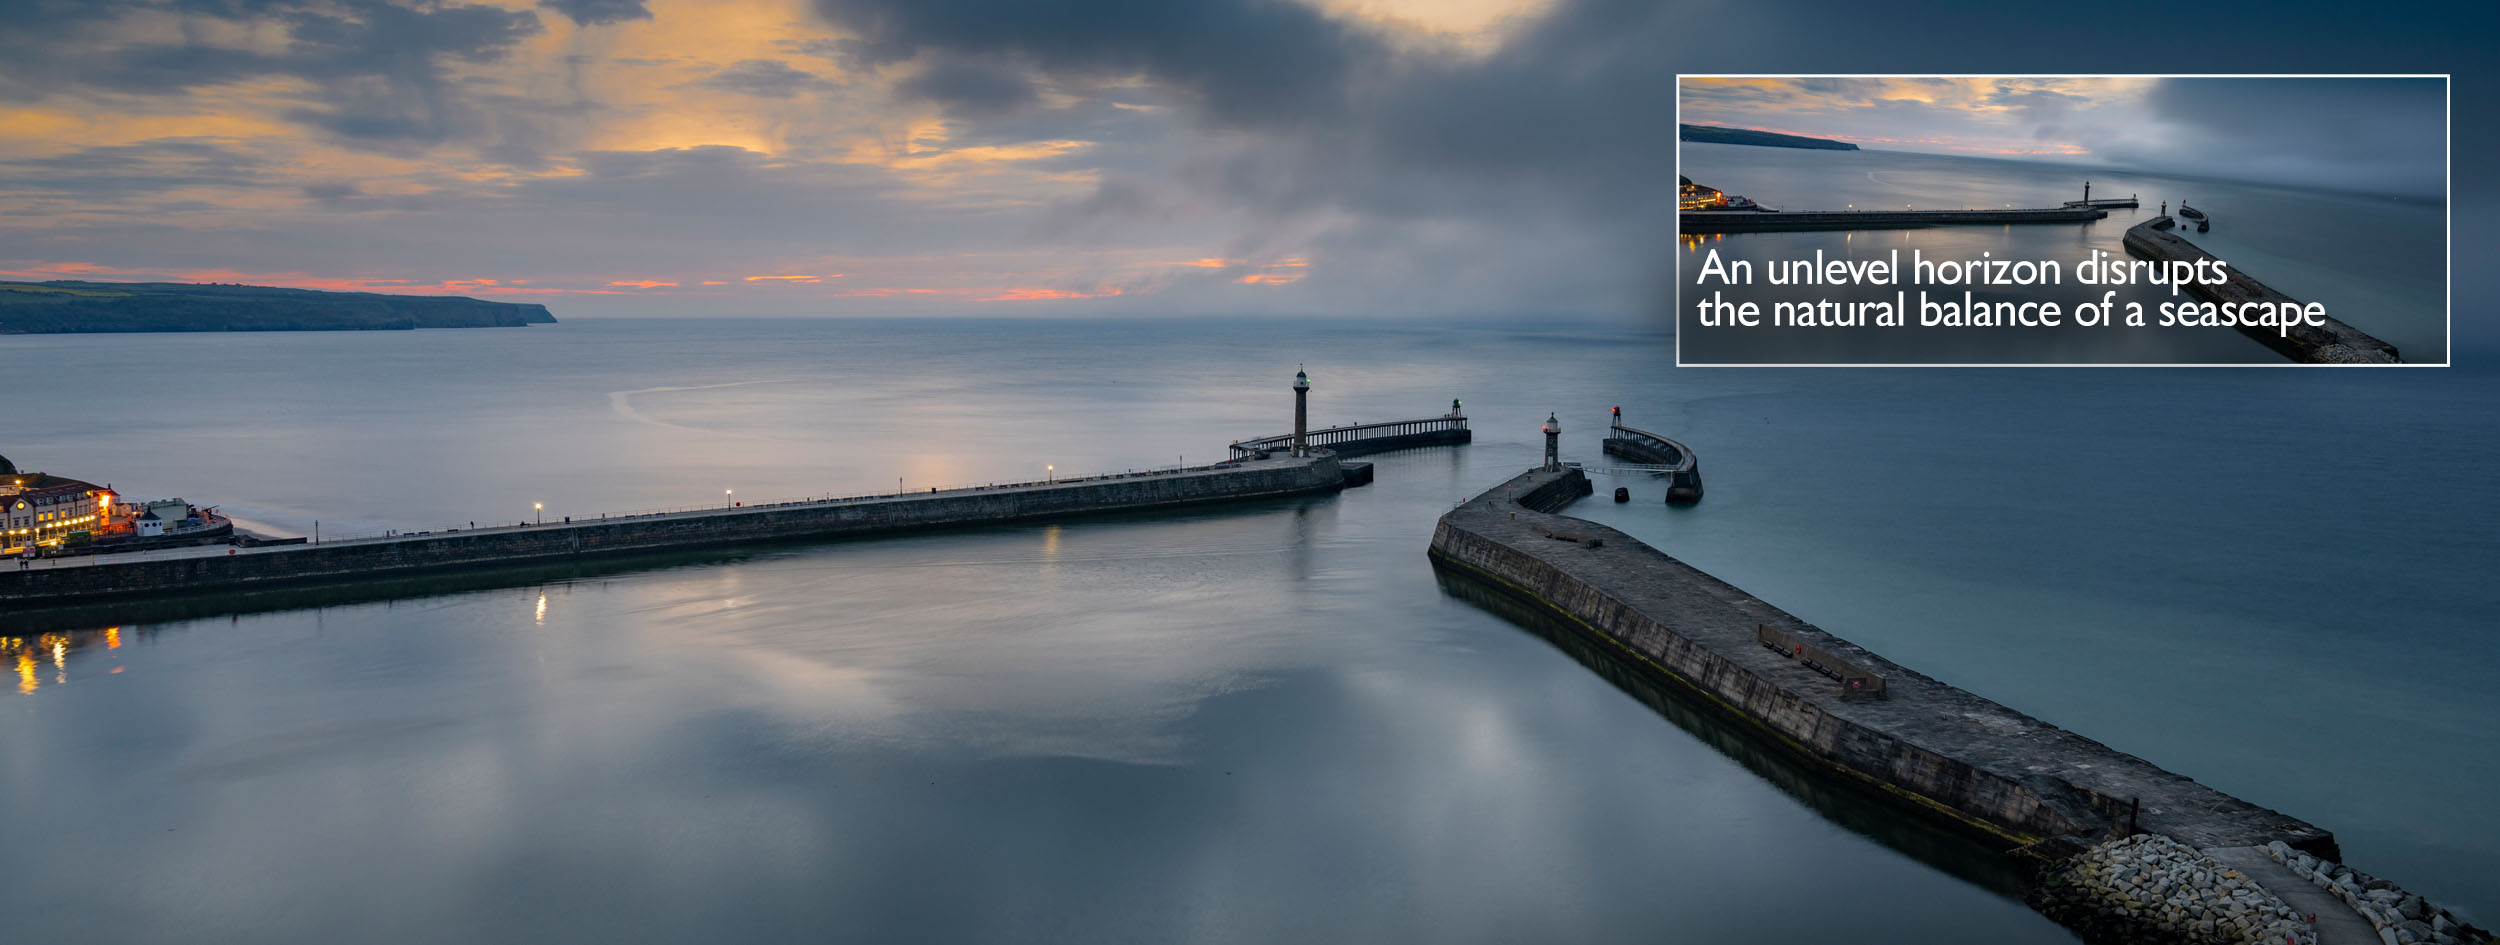
One of the crucial, but often overlooked skills in both landscape and architectural photography is the ability to capture straight horizons. This might seem like a small detail, but it's a critical one that makes the difference between a good shot and a great one. Ensuring your horizons are level isn't just about aesthetics; it's about presenting a balanced, pleasing image that reflects the world in its natural form. Non-photographers can't always explain why they prefer one image over another, but subconsciously they will register when a horizon isn't as it should be.

Why Straight Horizons Matter
In photography, the horizon line acts as the anchor of your composition. A tilted horizon can disorient your viewer, making the scene appear unsettled or off-balance. This is particularly crucial in landscape and architectural photography, where the emphasis often lies in showcasing natural beauty or structural grandeur with precision and harmony.
Tools to Help You Achieve Straight Horizons
Fortunately, achieving straight horizons is more straightforward today, thanks to a plethora of tools available to photographers at all levels:
2. Tripods with Level Bubbles: For those serious about landscape photography and critical composition, a sturdy tripod is a useful accessory. Many tripods include a level bubble, which ensures the base of your camera is perfectly horizontal before you even take the shot.
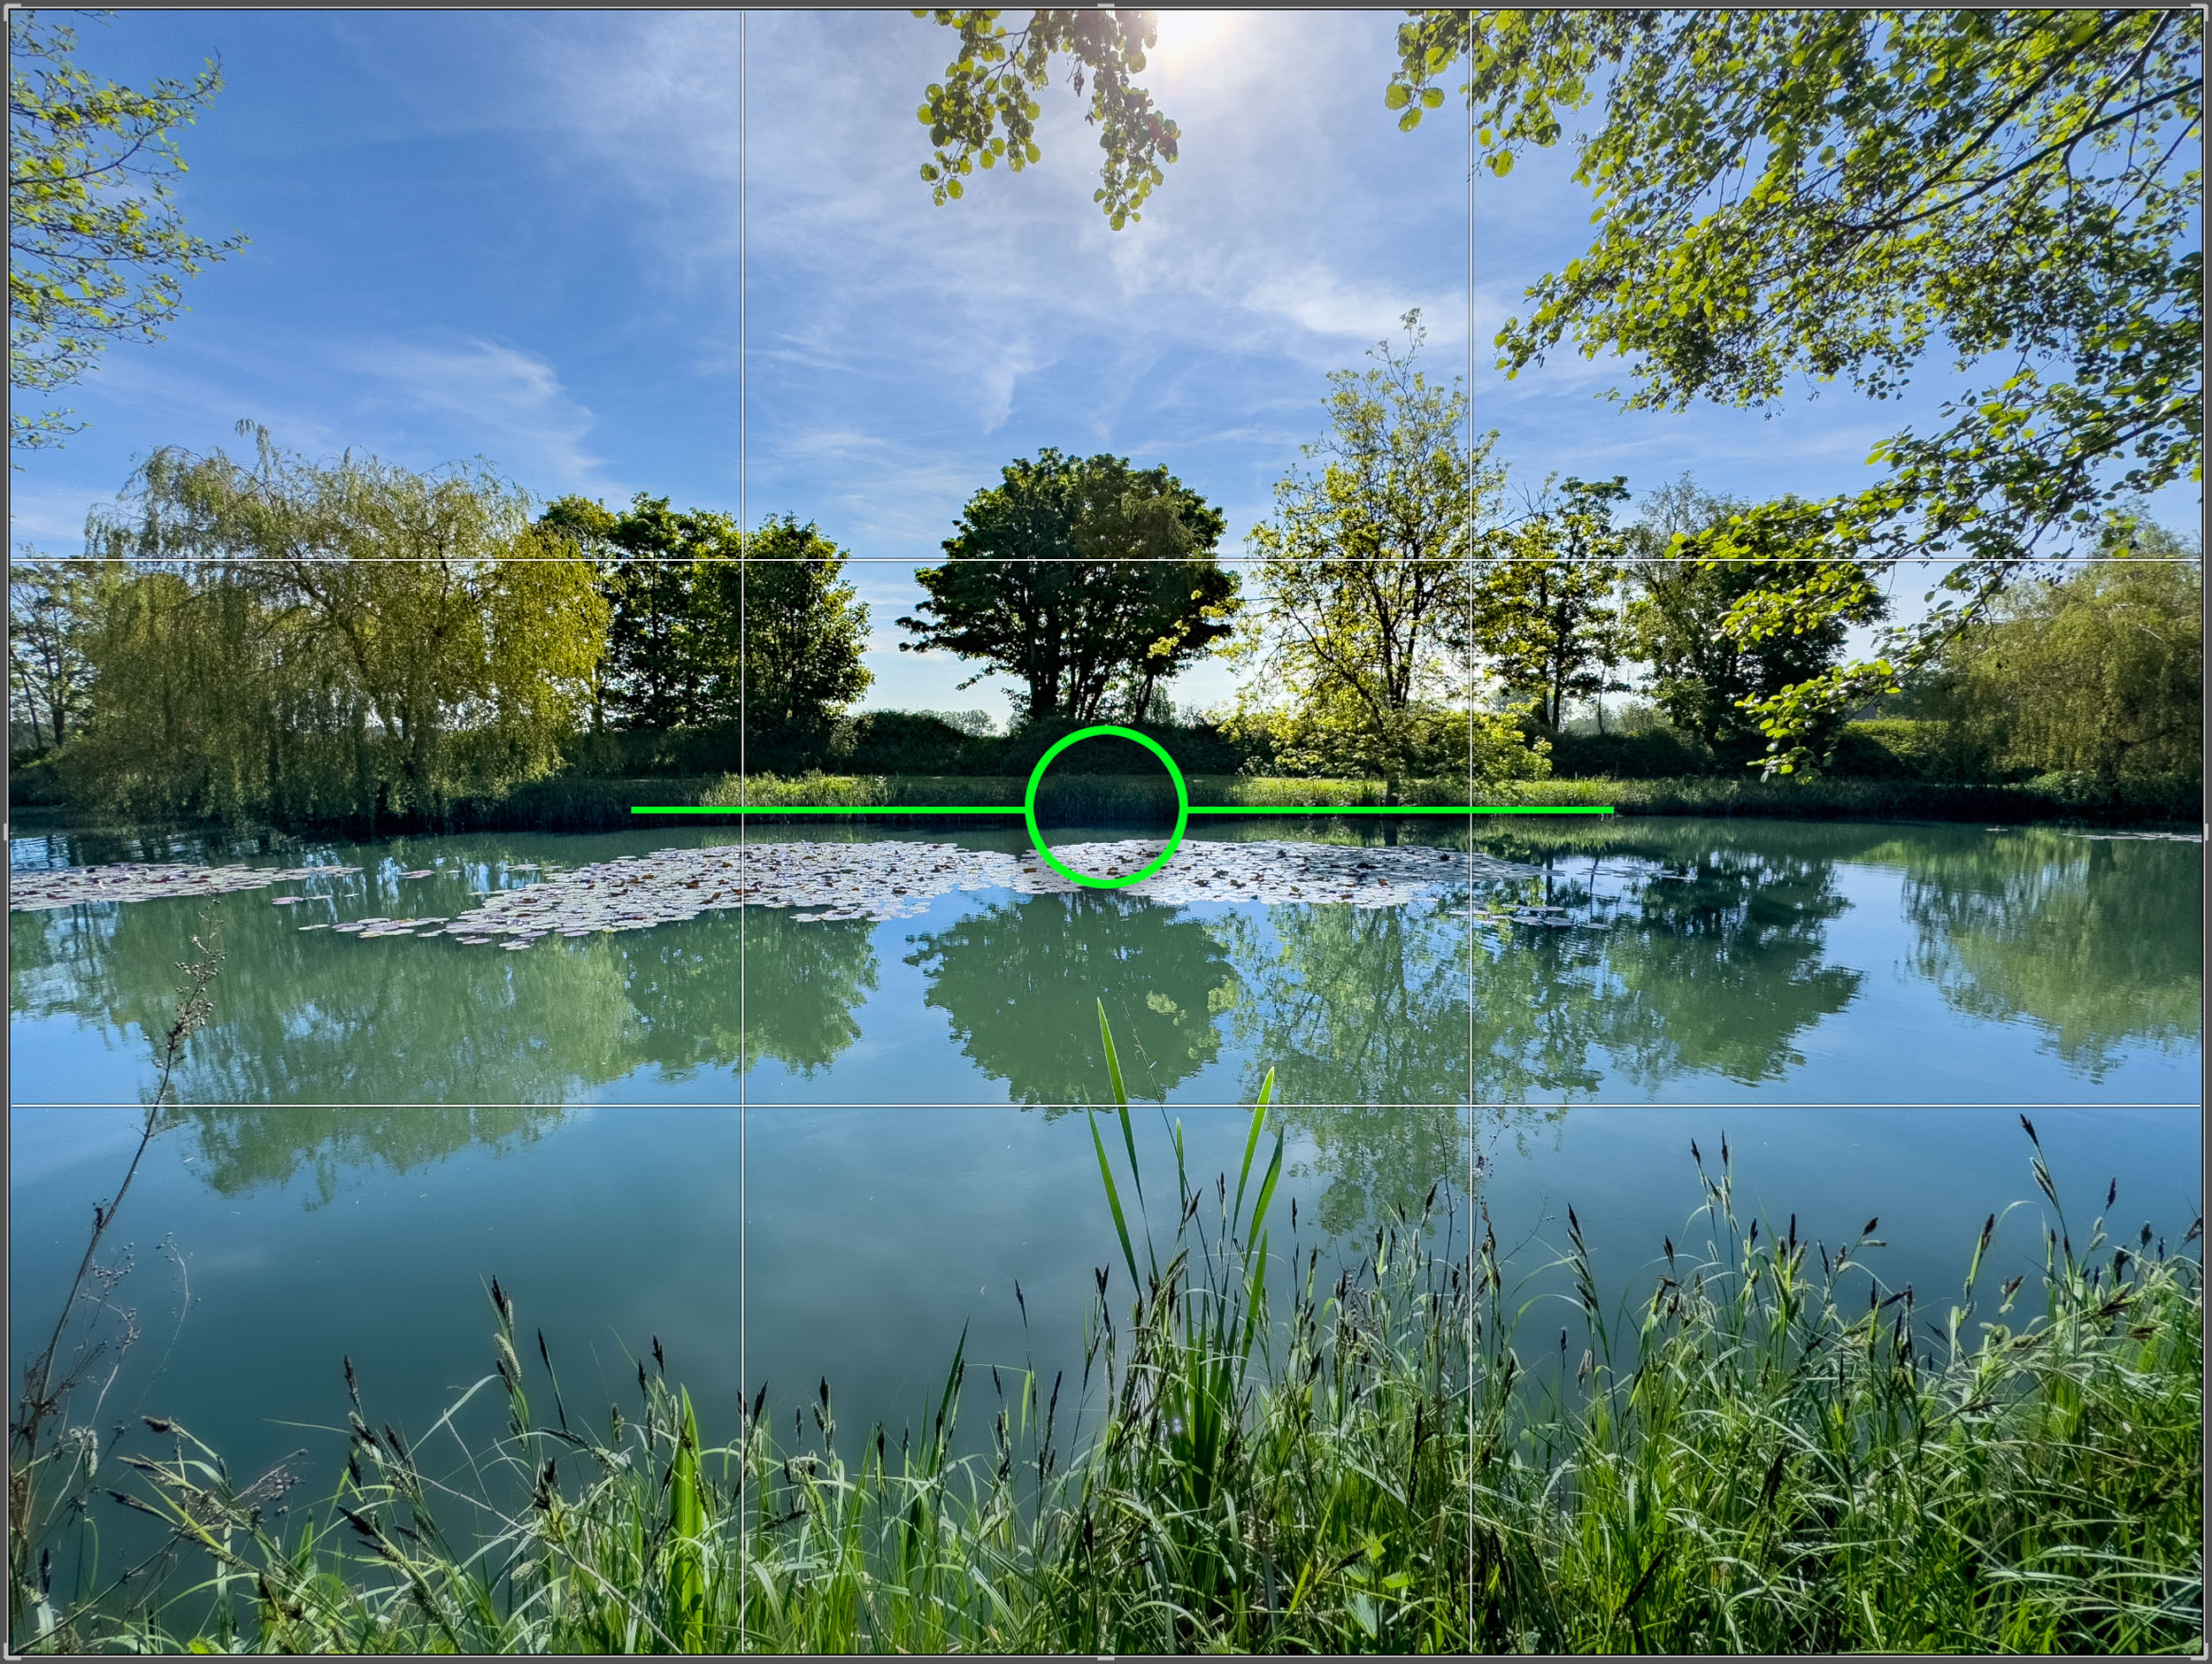
3. Grid Lines Feature: Activating the grid lines on your camera's display is a simple yet effective way to guide your composition. The horizontal lines can help you align the horizon to ensure it's perfectly flat.
Techniques for Straightening Your Horizons
While having the right tools is crucial, technique also plays a significant role in mastering straight horizons:
Keep Your Camera Level: This might sound obvious, but it's easy to overlook in the moment. As you frame your shot, make a conscious effort to keep your camera parallel to the ground. This is where your in-camera level indicator or the grid lines can be particularly useful, especially if you're hand holding the camera.
Be Mindful of Your Lens: Wide-angle lenses can distort horizons, especially at the edges. When using such a lens, try to keep the horizon near the centre of your frame to minimise distortion.
Perspective Control Lenses: For architectural photography, where precision is paramount, consider investing in a perspective control (tilt-shift) lens. These lenses allow you to adjust the position of the lens relative to the sensor, helping correct perspective and keeping lines straight without the need for extensive post-processing.
Post-Processing Fixes
Despite your best efforts in the field, some images might still end up with slightly skewed horizons. Here's how you can correct them during editing:
Straightening Tools in Editing Software: Tools like Adobe Photoshop, Lightroom, or even smartphone editing apps usually include a straightening tool. This allows you to adjust the angle of your image and crop it accordingly to maintain a balanced composition.
Use the Crop Tool: If your photo editing software doesn't have a dedicated straightening tool, you can use the crop tool. Adjust the borders of your image until the horizon is level, and then crop out the excess.
Check Your Work: After straightening the horizon, review your image thoroughly. Make sure other elements in the frame don't appear tilted or off-balance as a result of the correction. If your camera was pointing up or down when shooting then it's easy to end up with vertical parts of your composition looking tilted. To correct these as well as the horizon you may need to use more advanced post-production techniques which are often referred to as "perspective correction", particularly if there are buildings in your image.

Practice Makes Perfect
Mastering straight horizons takes practice. The more you shoot, the better you'll become at spotting uneven lines, both in your viewfinder and in your final results. Try to make a habit of checking the horizon before you press the shutter button. With time, this will become second nature.
Keeping your horizons straight is essential for creating visually pleasing and professional-looking images in landscape and architectural photography. By utilising the right tools, honing your technique, and applying necessary post-processing corrections, you can ensure that your horizons are always spot on. Remember, every detail counts when it comes to capturing the beauty of the world around you, so take the time to master this basic but fundamental skill and watch as your photography improves.